Pop the drawer #
Hit ALT + F12 simultaneously on your keyboard to perform a No Sale or Cash Payout. On some keyboards, you may need to hold Fn (function key) + ALT + F12. A No Sale will pop the drawer while a Cash Payout will prompt for an amount to deduct from the drawer.
You can also do this in the Sales screen under Actions > Do cash payout/no sale.
If your drawer will not pop, follow the steps below to connect it.
Cash drawer setup #
There are two ways that Insight-compatible cash drawers will connect.
If your cash drawer hooks up via receipt printer, it will have a cord similar to this:
If your cash drawer hooks up to your computer, it will have a cord similar to this:
Find out what kind of connection your drawer has and verify that it is hooked up properly. Then, follow the steps that apply to your setup below:
Receipt printer connection #
- Open Insight and go to Setup (might be under More) → System Setup.
- Click the Printing & Hardware tab.
- Check that the correct receipt printer is selected here. If the receipt printer won’t print, often the drawer will not pop.
- Click the Cash Drawer area (left-side menu).
- Click edit and check off Have a cash drawer.
- Check off attached to: My receipt printer.
- Under Code to open cash drawer, try Standard Epson/CBM and if that doesn’t work, try Standard Star.
- Click Save.
Hit ALT + F12 simultaneously on your keyboard to perform a No Sale to test popping the drawer. On some keyboards, you may need to hold Fn (function key) + ALT + F12.
You can also do this in the Sales screen under Actions > Do cash payout/no sale.
If your cash drawer will not pop, the most common problem is the connection between the receipt printer and the drawer. Try disconnecting the cash drawer cord from the receipt printer and reconnecting it. If issues still persist, call Insight support.
Computer connection (usually USB) #
First, we need to find out what Virtual COM Port the cash drawer is connected to:
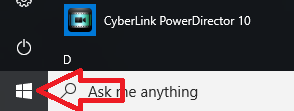
- Open the windows start menu:
- Search for Control Panel and click on it when it comes up:

- From here, click View devices and printers under Hardware and sound:

- Scroll to the bottom and look under Unspecified for a numbered COM port:
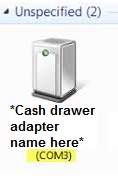
This is the COM port you’ll need to set in Insight in the next steps:
- Open Insight and go to Setup (might be under More) → System Setup.
- Click the Printing & Hardware tab.
- Check that the correct receipt printer is selected here. If the receipt printer won’t print, often the drawer will not pop.
- Click the Cash Drawer area (left-side menu).
- Click edit and check off Have a cash drawer.
- Check off Attached to: Virtual COM Port.
- Select the COM port you found previously here:
- Click Save.
Hit ALT + F12 simultaneously on your keyboard to perform a No Sale to test popping the drawer. On some keyboards, you may need to hold Fn (function key) + ALT + F12.
You can also do this in the Sales screen under Actions > Do cash payout/no sale.
If your cash drawer will not pop, the most common problem is the connection between the computer and the drawer. Try disconnecting the cash drawer cord from the receipt printer and reconnecting it. If issues still persist, call Insight support.